IMPORTANT – Only admins and users with permissions to edit can create and edit views.
If you are a user who needs to make changes but you don’t have access please contact support
1. To start, first log in using your email and password.
Log In Here
2. Then either create your view or navigate to the view you wish to add rules to.
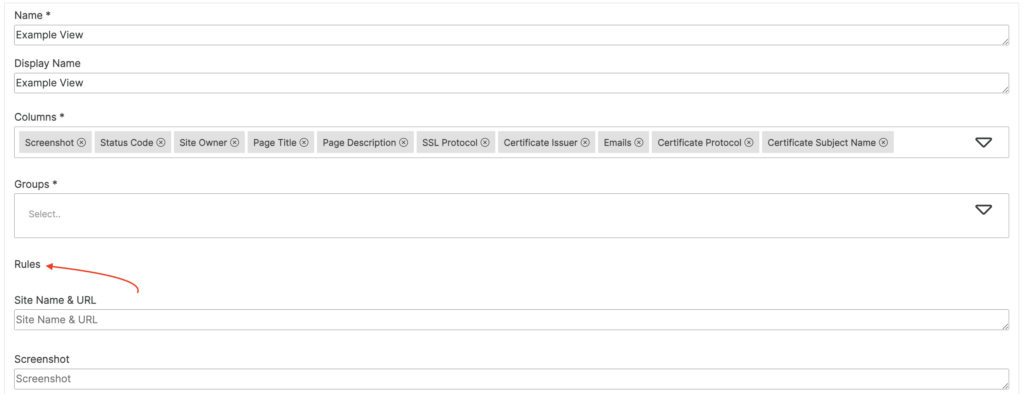
3. Scroll down the view and below the groups option, you can see the option to add rules to each column.

Here are the possible functionalities:
1. Exact Match
Type in the exact phrase you wish to match
Example 1: If you wish to find only sites with a 200 status code you would add
200

Example 2: If you wish to find sites with a 200 or 404 status code you would add
200
404

2. Starts With
Start with the phrase you wish to match followed by a %
Example 1: If you wanted to find all sites with one of the 300 status codes e.g. 301, 302, 303 etc you would add
30%

3. Ends With
Start with a % and follow by the phrase you wish to match
Example 1: If you wanted to find all sites which ended with staging plus your domain you would add
%.staging.littleforest.co.uk

4. General Match
Start with a % and follow by the phrase you wish to match followed by %
Example 1: If you wanted to find any sites which included the .cz language somewhere in the domain you would add
%.cz%

Example 2: If you wanted to find any sites which included the phrase TLS somewhere in the Certificate Issuer you would add
%TLS%
Once you have added you rules make sure you save by confirming at the bottom of the page.

Helpful Tips
- Resizing Boxes – Start with a % and follow by the phrase you wish to match followed by %

2. Unlimited Rules – There is no limit to rules. Add as many as you need including multiple rules for a single box.
Just click enter after the first rule you create and add your next rule, and so on.

For additional help understanding how to implement rules to your domain registry please email; [email protected]


